Code On Time 8.7.14.0 Unlimited Cracked
Code On Time 8.7.14.0 Unlimited Cracked
Creating apps to fulfill your business needs shouldn't be hard. And yet the traditional process for building applications involes a whole lot of work to put together frameworks, build up infrastructure, and compose forms from scratch. Put your time to better use by building your apps with the best app builder.
The ToDo List: Every App's Starting Point
In every business, users need to keep track of their tasks. These tasks can be orders, appointments, payments or any other unit of work. It makes sense to measure the strength of a RAD product by how quickly you can put a ToDo App together. Our ToDo App will feature grids, forms, calendar, charts, maps, business rules, and much more.
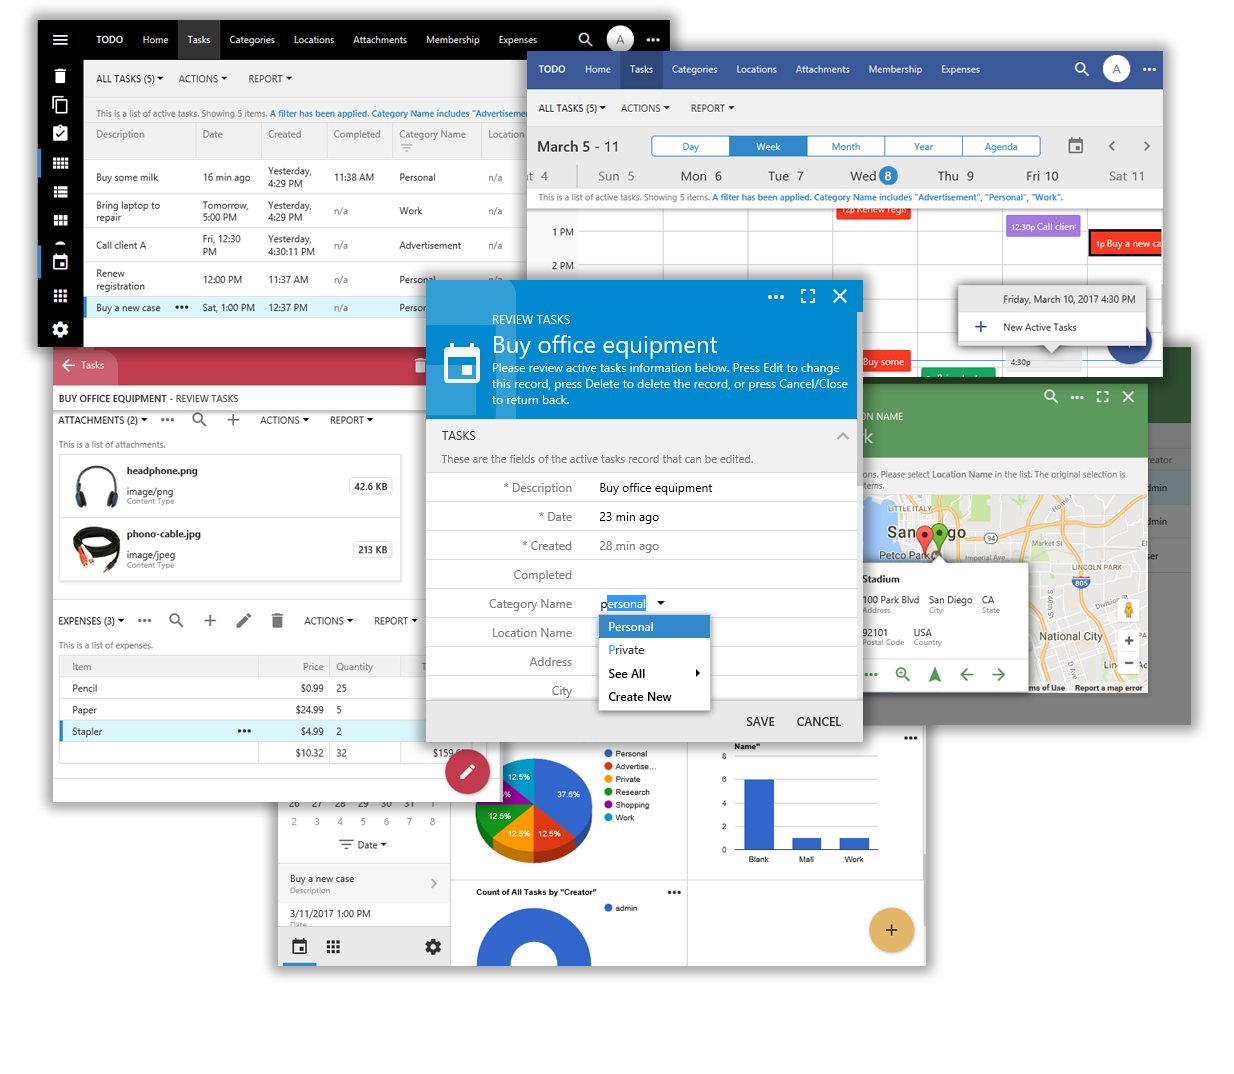
STEP 1 - Tasks
First, let's start with a single table that keeps track of tasks. Create Tasks table in a database hosted in Microsoft SQL Server, MySQL, Oracle, PostgreSQL, IBM DB2, SQL Anywhere, or Firebird. Code On Time app builder will "see" your table as the model below and turn it into an application.
A task management page will be created. This page will display a responsive grid of records. The user can search, filter, and sort data out-of-the-box. Tasks can be created, edited, or deleted. The calendar presentation style allows viewing data in a day, week, month, year, or agenda view when a date field has been detected. The mini calendar on the sidebar allows for quick filtering options by date. Data can be downloaded in PDF, CSV, Excel, Word, or TIFF format.
STEP 2 - Adding Business Rules
Let's customize the user interface and add some business rules to help the user create tasks.
Start the app builder, and open the Project Designer. Create a business rule for tasks to set Created to the current date and time when the create form is opened. Create a business rule to set the Date to the next rounded half hour. Hide the Created and Completed fields from the create form, and mark them as "Static" in the edit form.
Add a "Complete" custom action. Add one more business rule to set Completed to the current date when the user presses the action.
Finally, create a copy of the grid, and filter this grid to active tasks. It takes minutes to automate behavior, add custom actions, and filter views.
Creating a new task will now automatically set the Date and Created fields. Created and Completed are not visible in the create form. Saving the task will reveal the Created and Completed values. Press the "Complete" action to mark a task as completed. The task will disappear from the list of active tasks. Switch the view to "All Tasks" - the completed task can be seen. The Completed field was updated with the date and time the user pressed "Complete".
STEP 3 - Adding a Lookup
Let's classify tasks with categories. Create the Categories table in the database. Add a foreign key linking "Tasks" to "Categories".
It is easy to integrate the new table and relationship into the app. Simply refresh the schema, add "Categories" table to the model of "Tasks", and add a model for "Categories".
Start the application builder. Select your project and refresh metadata. Activate the Model Builder. Change the "Tasks" model to include the "Categories" table and borrow the "Name" field. Create a separate model for "Categories". It will take about a minute.
Inclusion of the Category field has unlocked a number of new features. Automatically created charts will pivot and present trends in the data. Tasks can be grouped by category. The Category lookup field in Tasks form allows typing in a category with auto-complete, selecting from a lookup view, or creating a new category in-place.
STEP 4 - Adding Maps
Let's say you want to maintain a list of locations where tasks are performed. For example, some tasks may be completed at home, school, or the workplace. Create a table called "Locations" and set up a foreign key linking "Tasks" and "Locations".
Users can now select from a list of locations when editing tasks. Locations can also be selected from a map. Selection of an item will populate the borrowed fields in the form. The Tasks page allows users to find the location of their task.
STEP 5 - Adding Master-Detail Relationships
Suppose that you want to associate photos or other documents with a task. Create the table "Attachments", with a foreign key pointing to "Tasks" table.
The new table will not affect the "Tasks" model. Just add the model for "Attachments". Borrow some columns from "Tasks", "Categories", and "Locations".
Create a data model for "Attachments". Use the Project Designer to add the "Attachments" data view field to the "Tasks" controller. Position the data view field in the edit form.
Adding complicated relationships is a snap with Code On Time app builder.
STEP 6 - Restrict User Access To Data
Hold on, there is no security in this application! We would also like to associate each task with a user. Use the app builder to add ASP.NET Membership tables to the database. Add fields "Owner" and "Creator" to the "Tasks" table.
Update "Tasks" data model to include "Owner" and "Creator". Enable ASP.NET Membership. Configure the two fields as a "User Name Lookup". Mark "Creator" as hidden in the create form, and static in the edit form. Add a business rule to assign the "Creator" and "Owner". Filter tasks to only display tasks where the owner or creator is the current user. Membership, user management, auditing, and filtering, just clicks away.
STEP 7 - Calculated Fields
Every app needs to be able to perform custom calculations for the user. Let's extend tasks with a list of expenses. These expenses will contain a field "TotalPrice", calculated by multiplying "Price" by "Quantity".
Add the "Expenses" model. Add a "TotalPrice" calculated field to the model. Add "Expenses" as a data view field to "Tasks". Mark "Quantity" and "Price" as fields that trigger the calculation. Add a business rule to calculate "TotalPrice" when the user makes changes to the expense. Define aggregates for "Price", "Quantity", and "TotalPrice". Add complicated business logic easily.
A list of expenses will be displayed on the "Tasks" form. When adding new expense, the Total Price field will be calculated automatically. The list of expenses will display an average of the "Price", as well as sums of "Quantity" and "TotalPrice".
Business rules written in SQL, C#/Visual Basic, or jаvascript can be used to extend your app with additional capabilities. Perform calculations, call stored procedures, send emails, query web services in response to user actions. The only limit is your imagination.
STEP 8 - Many-to-Many Fields
We would like to add any number of tags to each task. We will need to add a "Tags" table, and a "TaskTags" many-to-many relationship.
Add "Tags" and "TaskTags" table. Connect "TaskTags" to "Tasks" and "Tags".
Add "Tags" and "TaskTags" models. Add "Tags" as a check box list to "Tasks", and add it to the form. Change "Tags" to a basket lookup. Your users will love the easy-to-use forms and lists created by Code On Time app builder.
The "Tags" check box list allows checking any number of tags to associate it with the task. Press "Create New" to add new tags to the database. The "Tags" basket lookup allows the user to type in tag. If the tag is not present in the table, it will be automatically inserted.
STEP 9 - Status Bars
Let's add the ability to track the status of each task as it progresses through the user workflow with a visual representation of the state of the task.
Include the "Status" field in the "Tasks" model. Mark "Status" as a "Drop Down List". Add static items to the "Status" field. Update business rules to configure the status as "New", or "Delegated" if the task has been assigned to a different user. Also update the "Complete" action to set the task's status as "Completed". Create a status bar definition to visually represent the state of task to the user. Use status bars to communicate information easily to your users.
The "Status" will be rendered as a drop down list. It will be assigned "New" when a task is created. If the task has been delegated to a different user, then the task will be set to "Delegated" status. The user can use the drop down to set the task to "In-Progress" or "Canceled". Pushing the "Complete" action will mark the task as "Completed". Different status bars will visually explain to the user the state of each task.
Deploy to any device
Now that the app is complete, it comes time to bring it to the users. If you have access to a dedicated IIS server, simply copy the app to the server and configure the folder as an app.
No server? no problem. Easy cloud deployment to Microsoft Azure can be done straight from Visual Studio. Free app deployment plans are available.
Start the "Publish Web App" process from Visual Studio, enter account credentials, and the app will be deployed shortly.
Warning! You are not allowed to view this text.